What are panniers? What are granny gears?

A few people have asked us what our blog name means, so this is a quick post to explain. Panniers are the bags we hang on our racks that hold all of our stuff. We will both carry four panniers, two on the front, two on the back. 

Granny gears are the very low gears on a bike that allow us to make it up steep hills with 50+ pounds of gear on each of our bikes. On our Southwest Colorado bike tour, Dani didn’t have granny gears; therefore, Ted carried most of the weight. Dani will not be so lucky this time. 

We’re leaving Kona, HI (because we had an opportunity to take a trip to Hawaii and we couldn’t turn it down) on a red-eye tonight and will begin our tour tomorrow!


Beautiful Pololu Valley in Kohala, HI

Tips and Tricks: Packing your bike for shipping

Let me start by saying that I don’t intend for this post to provide comprehensive instructions for how to pack a bicycle for shipping. The internet abounds with videos that serve that purpose and that were created by people more competent than I. Instead, this post is meant to show a few pictures of what ended up consuming most of a Sunday and to share a few tips that I didn’t find elsewhere (although I’m certain I’m not the first to think of them).

DSC_0463

Tip #1: Do it yourself. There’s a lot to be said for the convenience of putting someone else in charge of disassembling, packing, and shipping your bikes before your tour. But that convenience comes at a cost.  I’ve talked to bike shops that charge anywhere from $40 to $100 to pack a bike, and that excludes shipping. That’s a lot of money that could otherwise be spent splurging on a nice meal or a motel on a rainy night on our tour. Toss in the sense of accomplishment and self-sufficiency and some other lovely intangibles, and doing it yourself is definitely worth it.

Tip #2: Get a box from a bike shop.  You can buy brand new cardboard bike boxes from shipping stores and bike shops from $10 to $25. Or you could walk into a bike shop and say, “Hey! I’m going on a bike tour and I need to ship my bike. Do you have any empty bike boxes that I could have?” Generally they do and generally they’re excited for your trip and happy to help. (Aside: if your bike shop tries to charge you for something that they’re going to throw away, not only should you not pay for the box, you should also find a new bike shop.)

Tip #3: Use www.shipbikes.com. I don’t know how they do it.  It doesn’t make sense. If I go to the FedEx website and enter my bike package details, I am quoted a price of roughly $155 (UPS and USPS give similar quotes).  When I go to ShipBikes (which uses FedEx) and enter the same information, the quoted price is roughly $60. It’s not a scam; you print out a FedEx label and drop your bike off at a FedEx location. But I have no idea how they’re making it work.

(Tangential) Tip #4: Bike stands are amazing. This isn’t strictly related to packing your bike for a tour, but it merits mentioning. I received a bike stand as a gift a year and a half ago, and it’s one of my favorite possessions. Suddenly, basic maintenance became a breeze and slightly more complicated maintenance (that includes the use of both hands, pedaling, or anything that is inconvenient on an upside-down bike) became much more feasible. I’ve learned tons about bike maintenance since I received the stand, which has saved me lots of money and also increased my confidence in my ability to perform on-the-road repairs on the tour. The stand folds up and lives in a small corner of our closet, so it’s worth the storage space (even in our 319 sq ft. apartment).

DSC_0468

Tip #5: Protect that pesky rear derailleur. If someone came up to me and said, “Ted, I’m going to give you a ton of money on the condition that you only use it for bike-related purchases,” I would a) do everything in my power to build an ongoing relationship with that person, and b) buy a Rolhoff Speedhub. The rear derailleur is one of the most critical aspects of a well-functioning bike, and it is also the most vulnerable to damage.  When we went on our honeymoon tour down the Oregon coast, the derailleur on my LHT was bent slightly inward during shipping. It wasn’t impossible or even difficult to ride, but the shifting was off just enough to make it incredibly frustrating.

I don’t want to deal with that again. When I packed up my bike, I removed the chain from the rear derailleur by taking out the bottom jockey wheel. Then I removed the derailleur from the frame (leaving the cable attached) and wrapped it in bubble wrap.  Then, in order to make it as safe as possible, I rested the wrapped derailleur on the drive-side chainstay before I zip tied the front wheel to the frame, which held it nicely in place between the two wheels (you can see the result in the image above).  Hopefully this minimizes the risk of damage during shipping.

Tip #6: Shortcuts can veer long. This goes in the “obvious observations” file. Bike boxes are designed to fit the bike in the smallest possible box to keep shipping costs down. Thus, it’s tough to fit your bike in the bike box with all of its cumbersome accessories attached to the frame. I know this. I knew this.  But I still tried to pack my bike without taking off my rear rack and rear fender. That was a bad decision that led to unnecessary stress and annoyance. Take all of your accessories off and pack them in after the bike is already in its box.

DSC_0469

I got so good at maneuvering the boxed bikes on top of a longboard that I almost regret not having more bikes to pack. Almost.

Tip #7: Do what you can, but it all comes down to hope. Once the bike was in its box, I stuffed the empty space with newspapers to pad the bike and minimize the amount the bike could move around inside the box. I also wrapped accessories (e.g., water bottle cages) and put them in the box with the bike. Then I taped signs to the both sides of the box imploring the FedEx people to please treat my bike nicely.  And it will probably be fine.  But there’s always the chance that my bike will end up on the bottom of a big heavy pile or that it will cross paths with a FedEx employee who is having a bad day.  I could have certainly packed my bike more carefully and I hope I don’t regret not taking every precaution. For now, I’m just hanging on to hope!

We’ll let you know whether these tactics worked when we pick up our bikes in a couple weeks!

Tips and Tricks: Getting your Brompton onto a plane and into an overhead compartment

We did a ton of research on which folding bikes to purchase and ultimately landed on Bromptons for one reason: they fit in an overhead compartment (unless you’re on a tiny plane; more on that later). Yes, Bromptons are more expensive than Bike Fridays, Dahons, etc., but with bike luggage fees running up to $150 (one way), we will definitely save money after just a couple trips.

Airlines known for their focus on customer service are more likely to be okay with you putting your bike in an overhead compartment; however, you might have to be a little crafty because (1) Bromptons do not technically fit within most airlines’ allowable dimensions and (2) the whole “folding bike on a plane” thing is new and it just seems wrong. We’ve had success with Jet Blue and have heard positive stories from people flying Southwest.

Here’s what we did to get our bikes on the plane to San Jose, California with very little resistance from airport employees.

Before arriving to the airport:

Check the size of the overhead compartment when you book your flight. Your Brompton might not fit in a given airplane’s overhead compartments. It’s your job to figure out if it will. When you book a flight, the airline will tell you what type of plane you’ll be flying on. Do a quick search for the dimensions of the overhead compartment of that plane. Make note of these dimensions–as well as the dimensions of your Brompton–to share with the gate employees if they tell you your bike won’t fit. People can’t argue with math. Well, they can, but they’ll lose. It also helps to mention that you’ve carried your bike onto this exact model of plane before, so you know it will fit. We actually had to do this on a flight and the employee just shrugged and waved us on.

Also, some planes have large overhead compartments on one side and small ones on the other. This is a good piece of information to have if the gate employees tell you your bike won’t fit. It goes without saying, but if this is the case, try to board early even if you have to pay a little extra to do so.

Purchase the Dimpa bag from Ikea to disguise your bike, if necessary. Like I said, even though Bromptons are around the same size as a carry-on suitcase, airport employees still tend to be a little wary of people carrying bikes. We brought Ikea’s lightweight, durable, $4 Dimpa bags on our trip to California in case we suddenly got nervous or noticed some suspicious eyes watching our bikes. These came in handy when we needed to disguise our bikes on the Amtrak train in San Luis Obispo (where bikes are explicitly not allowed), and they also made carrying the bikes through the airport super easy. Yes, they’re slightly transparent, but somehow they still worked for us.

At the airport:

Remove the seat and seatpost and put a tennis ball on the seatpost opening. This step is crucial! Your bike will not fit in the overhead compartment with a bike seat. This requires an allen wrench, so make sure you keep your bike tool with you on the plane or remove your seat before checking your tool.

Don’t ever unfold your bike. Fold your bike the second you get to the airport and never unfold it again. People are more willing to turn a blind eye if they don’t ever see that your steel contraption actually does unfold to a full-size bike. It’s one thing to think this is possible, but another to see it happen. Like I said, bringing a bike through an airport is weird and airport employees’ (particularly TSA employees’) jobs revolve around noticing things that are weird and preventing them from happening. Try to fly under the radar.

Be cool. If you act like you know what you’re doing, people will be less likely to question you. We got the most questions about our bikes at the TSA checkpoint, but we just calmly answered people’s questions, smiled, and pretended it was just an everyday thing. All of the TSA employees we spoke to quickly turned from suspicious to curious, and we ended up laughing and cracking jokes with them.

Put the bike in rack/rolling wheels to the front, handlebars up. Once you get on the plane, you want to get your bike in the overhead bin as quickly as possible so as to not raise suspicion and also just to say, “I told you so.” The only way to do this is top first, handlebars up. Memorize this. Do not try it another way. You will waste time, it will not fit, and a flight attendant will approach you to say, “Ma’am, you’ll have to gate check your luggage” faster than you can say, “Holy mother of god, why did I listen to that idiot blogger.” A Brompton without a rack fits very easily, but a Brompton with a rack will still fit as long as you put it in top first, handlebars up.

At this point, you can rest easy! Your bike is on the plane and you didn’t even have to pay $150 to get it there. Congratulations! Now you can reassemble your bike, which should only involve putting the seatpost back in.

Installing Ergon GP2 handle grips, the most comfortable handle grips we’ve ever used!

A quick note: the most important part of this process is making it past security. Once you’ve done that, the worst that can happen is that you’ll have to gate check your bike (definitely not ideal, but still free). This is where your Dimpa bag will come in handy. If you have the time and ability, try to pad your bike in its Dimpa bag with extra clothes so that the luggage handlers don’t do too much damage. Although, we’ve heard stories of bikes without any protection at all going through the checked luggage process and coming away without any damage. This is not something I’m eager to try, but it’s a testament to the quality and durability of Bromptons. So if you’re planning to travel with your folding bike, spend a little extra money and get a Brompton. It will pay for itself after a few plane trips!

(Organized?) Chaos

OLYMPUS DIGITAL CAMERA

Welcome to our living room. This pile of gear is a mess, but at least it exists! Small steps. Check out our packing list (and much more organized pictures of gear) here.

We’re also very close to having figured out all of our trip logistics. Dani just graduated and is finishing her two internships this week. Ted is wrapping things up at work and rushing to complete all of his paperwork to begin law school (three days after we expect to return :-/). We’ve just found a place for our car and dog, and recently secured a house sitter. Our list of little things to do before we leave is still quite long, but we’re happy to have gotten most of the large things sorted.We waver between feeling terrified and excited about this trip, but we’re definitely ready to stop worrying about it and get on the road!

Carmel to SLO Day 3 – San Simeon State Park to San Luis Obispo

Day 3 – 46.8 miles – 1,766 ft. elevation gain

The alarm went off this morning around 6:25, and we got out of bed pretty promptly. Dani said that she didn’t sleep particularly well (it was a little warm and very sticky after two days of biking without showers). We broke camp pretty quickly and headed out without breakfast because we knew the town of Cambria was less than three miles away. The town was off the highway and fairly cute. After consulting Yelp, we ended up at Creekside Gardens for breakfast. It was over 25% cheaper than breakfast the day before and I’d say twice as good. It’s amazing what a little competition can do. We sat out on the patio in back and charged our phones. The only downside to this place was that they weren’t providing tap water due to the drought.

After breakfast we climbed a hill (large for the day but small/medium for the trip ) and turned back onto Highway 1. The next 15 or 20 miles were pretty unremarkable, except for the lovely tailwind pushing us along. You don’t really notice a tailwind as you’re riding (aside from feeling like you’re really strong and fast), but Dani pointed out the extent to which the grass and trees were swaying in the wind and we were very happy that we weren’t riding north.

dani hill

At least there was shade on this hill.

over

Dani demonstrating her flawless no-look, over the shoulder photo technique.

Dani

We turned off the main highway to ride through Cayucos. Taking the Business Route 1 through town saved us a big climb on the normal road. After this town, Highway 1 got a lot less pleasant. It turned into four-lane highway, and even though there was a very wide shoulder, it quickly became unfun. This continued through Morrow Bay.

After Morrow Bay, we remembered that Google had suggested an alternate route into San Luis Obispo that was a little bit longer but not on the expressway. Dani did some quick Googling, and led us on a detour on Turri road off of Los Osos Valley Road north of Baywood-Los Osos. This was one of my favorite parts of the trip. Turri road (which is apparently often used for bicycle photoshoots) is a nearly empty road that passes through beautiful farmland. It was the only time on the whole trip we rode on a non-busy road, and it was amazing. The couple of trucks that did pass us slowed down and gave us wonderful amounts of room. We took lots of pictures and a few videos.

Turri 1

empty

Oh for an entire tour with this little traffic.

Where's Dani?

Can you see Dani? She’s there!

The Turri road detour added six or seven miles onto our trip, but we still made good time to San Luis Obispo. Once we made it into town we heading to the local YMCA, where we paid $20 for a day membership so we could take a shower. After our shower, we rode to the High Street Market and Deli, where we got some astounding sandwiches, and then continued on to the train station, where we sneaked our folded bikes onto the luggage rack and relaxed on the ride back up to San Jose.

bags and bikes

Bags and bikes, ready to go.

We made it!

We made it!

Train

The train station.

Map and stats.

Total Stats: Three days, 145.4 miles, 11,733 ft. elevation gain

Final Map:

Carmel to SLO Day 2 – Kirk Creek Campground to San Simeon State Park

Day 2 – 41.8 miles – 3,589 ft. elevation gain

We woke up at 6:00. Well our alarm went off at 6:00, I got out of bed at 6:15, and Dani got up around 6:40. We had some snacks for breakfast and took longer than Dani liked to pack up, so we didn’t leave until 7:40.

Ready to start the Day!

Ready to start the Day!

Foggy morning by the sea.

Foggy morning by the sea.

There's the Sun

There’s the sun!

We climbed a couple of fairly sizable hills – sizable enough to convince us that they were the two big hills we were anticipating today – and came to the adorable town of Gorda. There was a cute restaurant (The Whale Watcher’s Cafe) overlooking the ocean so we decided to eat second breakfast. The food was delicious. When we walked in an orange cat was sitting at a table drinking milk out of a cup. Just cute all around. We charged our phones and ate delicious omelets, then headed out. As we packed up our gear we saw three Brompton bike tourists! Stephano, Laura, and Julia are from Brighton, England and were traveling from San Francisco to Los Angeles on their Bromptons. What are the odds? They were super friendly and made us want to move to England. We sort of leapfrogged them and the father-daughter duo from the campground all day.

After we left Gorda we encountered the actual giant hill and chugged up to the top. Then we went down about two to three hundred feet and promptly gained it all (and a little more) back up the second peak. But that second hill was the last huge hill of the day (and the trip) so it was ok. Beautiful scenery of course and the sun came out as well. On the down side of the hill we stopped at Ragged Point, where we refilled our water bottles with cucumber infused water at the fancy-schmancy cafe and walked behind the restaurant to find a spectacular view of the bluffs and an awesome cove with turquoise water. We decided against hiking down to the beach, but we took lots of pictures.

Ragged Point Overlook

Ragged Point looking south

The terrain leveled out considerably after that. We also had a nice tailwind so the rest if the day was a breeze (HA!!). The highlight of the day was a vista point that had a gorgeous little trail to a lighthouse and a large elephant seal population. This was one of the most beautiful places I’ve ever been, but the pictures don’t do it justice.

Taking the Brompton offroad

Taking the Bromptons offroad.

I wish you could have been there in real life.

I wish you could have been there in real life. So. Freaking. Beautiful.

We got to San Simeon after that and ate linner with our British friends. They are hilarious and fun and wonderful and we hope to visit them in Brighton someday. After lunch we hung out at the beach for a bit then did the final couple miles to our campsite.

Brompton buddies!

Brompton buddies!

Brommmies on the beach.

Brommmies on the beach.

The hiker biker sites at San Simeon were rather disappointing. Just a grassy corner of the campground, surrounded by car campers and right next to highway 1. The bright side of this is that we were also right next to the beach. We saw the best sunset of the trip, did a little coordinated stretching, practiced “Chi Running,” and drank the bottle of wine that we purchased in San Simeon village.

Sunset

Sunset again.

One more day to go before we finish our short tour!

Map and stats.

Carmel to SLO Day 1 – Carmel to Kirk Creek Campground

Day 1 – 56.8 miles – 6,378 ft. elevation gain

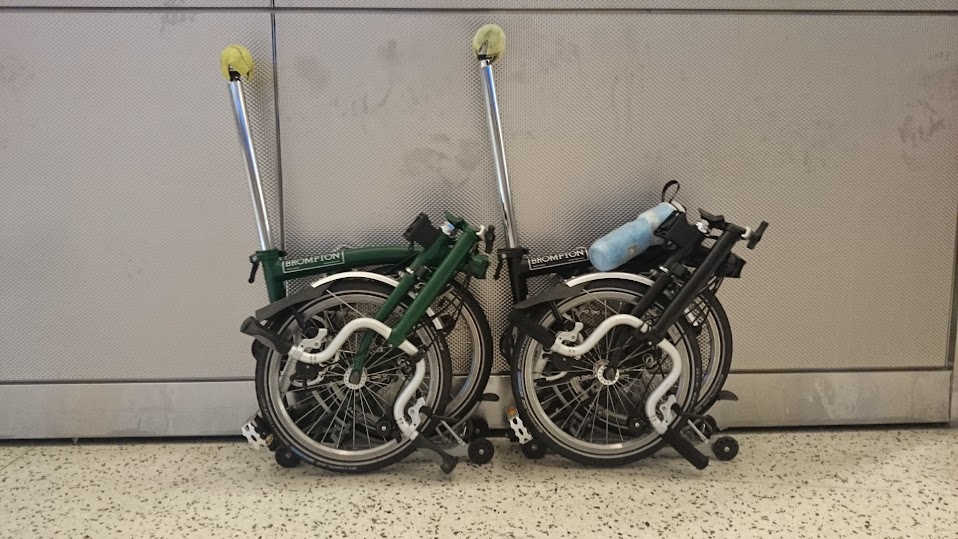
We started this tour after spending a few days with friends from Colorado in Carmel. We stayed up later than we wanted last night, getting caught up in an intense game of spades and not going to sleep until close to 2 am. We woke up bleary eyed at 6:30 in the morning, heated up leftovers from dinner two nights ago and did the final bag pack.  Took everything outside, unfolded the bikes, and pushed the bikes up the hill outside of the house. Maybe not an auspicious way to start the tour, but it was a steep freaking hill.  I’m happy to say that this was the first/last/only hill we weren’t able to ride.

The first hill is the steepest, baby I know...

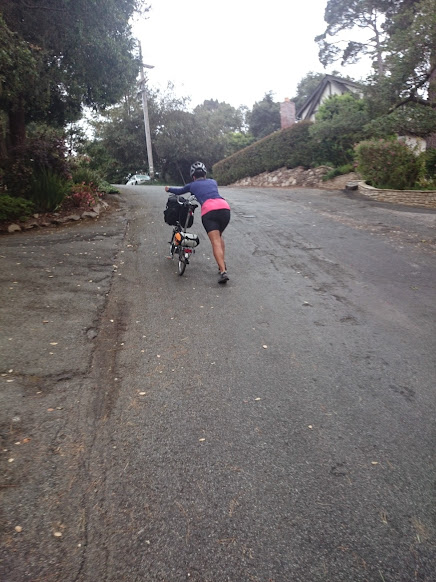
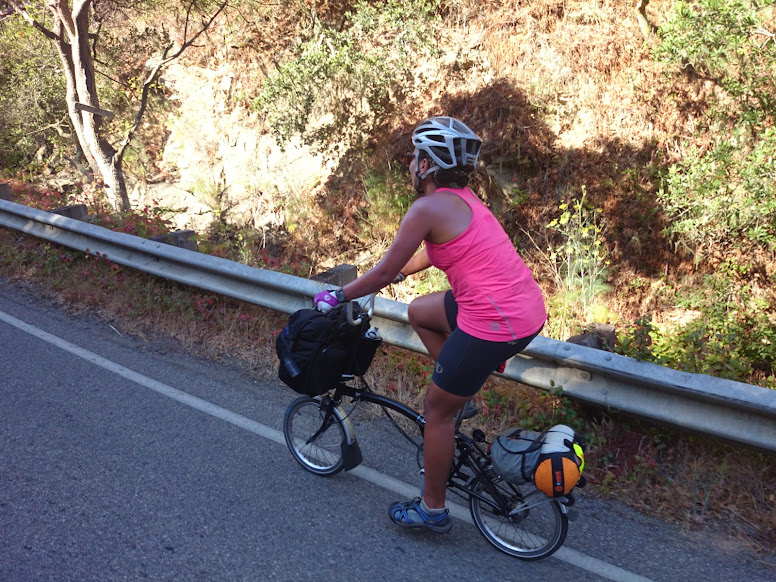
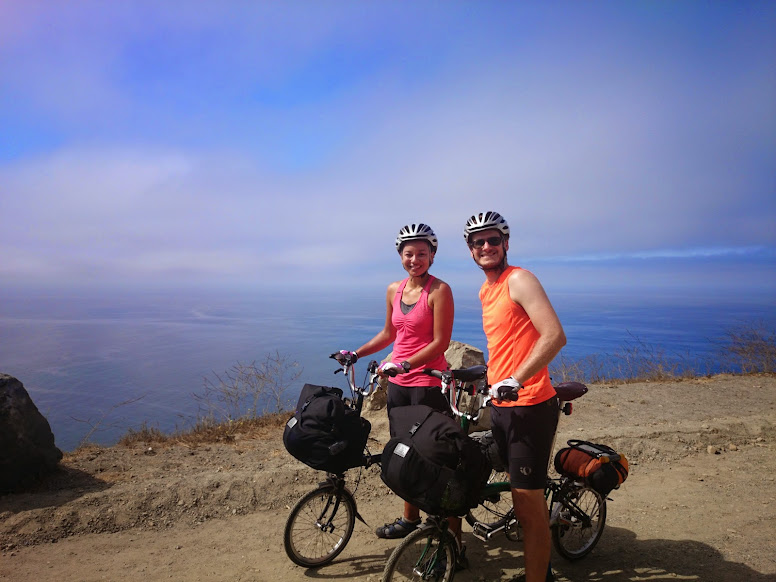
The first hill is the steepest, baby I know…

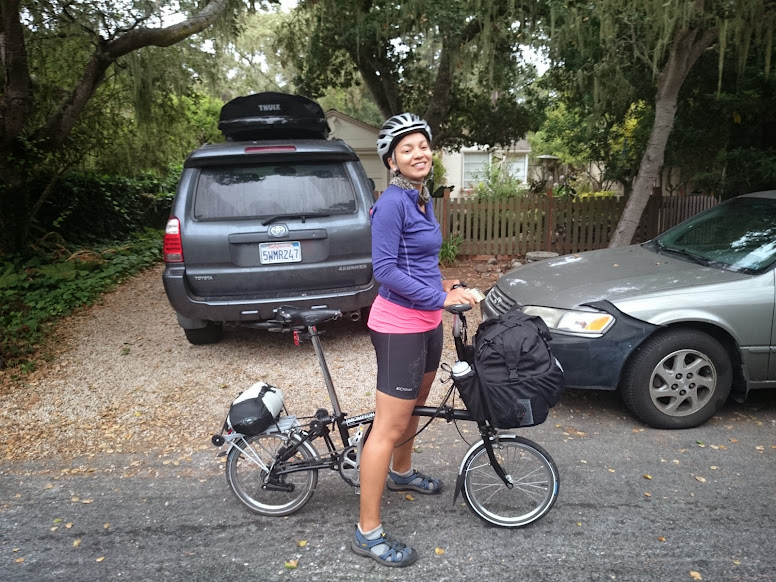
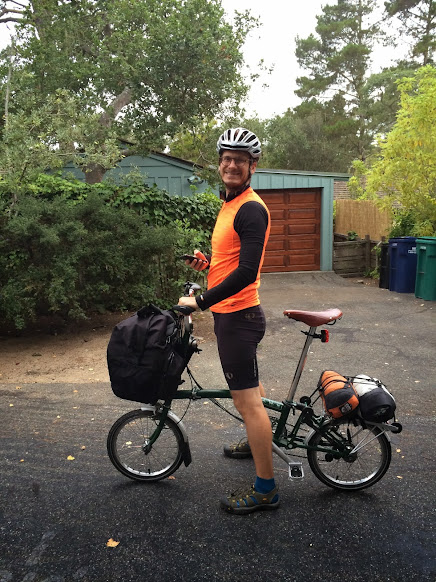
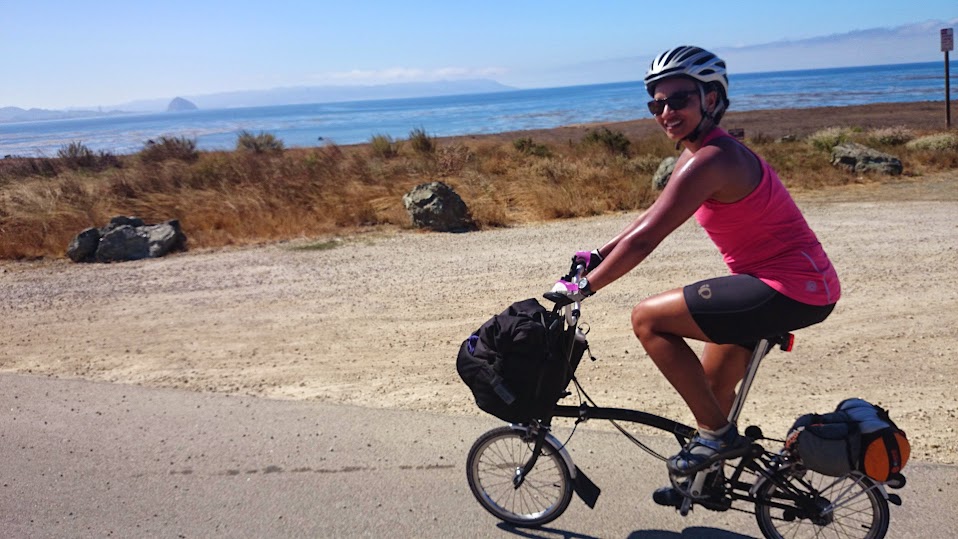
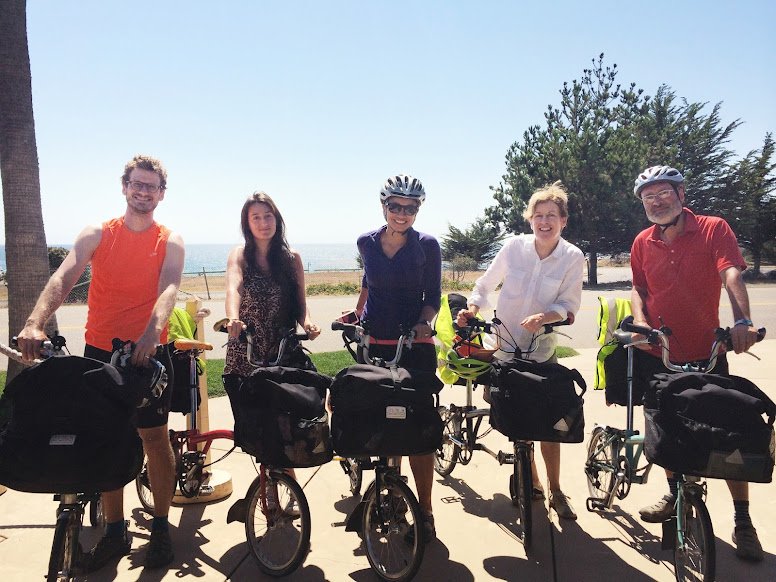
Starting off! (at the top of that hill)

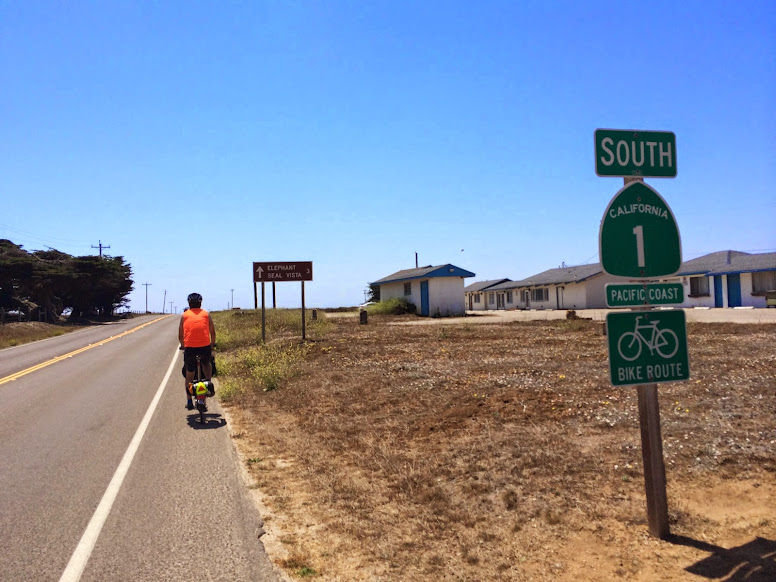
We started at 7:30 in a chilly misty rain. There were some rather steep hills coming out of Carmel and Dani had some early doubts about the wisdom of taking on the hills of Big Sur on our Bromptons. For the first few miles out of Carmel, highway 1 was a busy multiple-lane highway. It subsequently narrowed to two lanes, but it didn’t get much less busy.

The ride was up and down, but it felt like more up than down. We passed Point Lobos and Carmel highlands, which had several adorable houses. The rain cleared up after the first hour or so and we had sunshine for pretty much the rest of the day.

About 17 miles in, we came to the famous Bixby bridge, took some pictures, and met another bike tourist named Ricky. He was heading down the coast to San Diego and then over to Florida… And then maybe to the islands.   He was both very smart and articulate and maybe a little nuts.
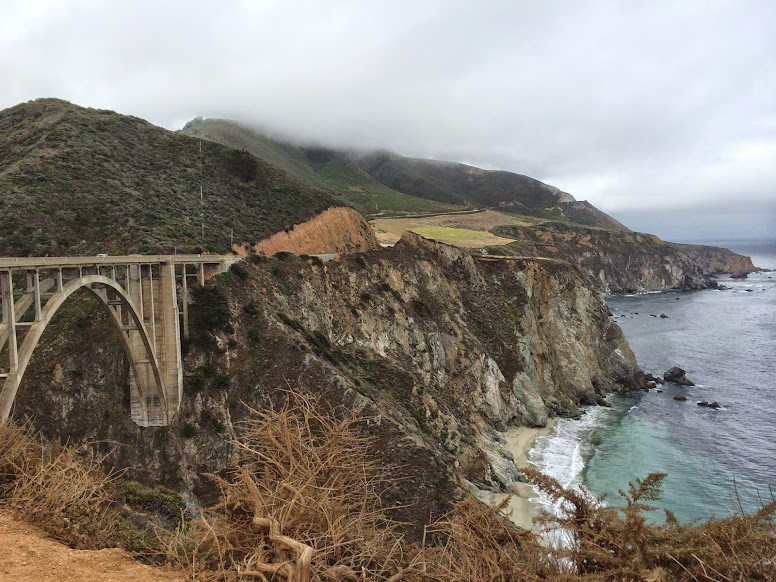
Bixby Bridge

Bixby Bridge

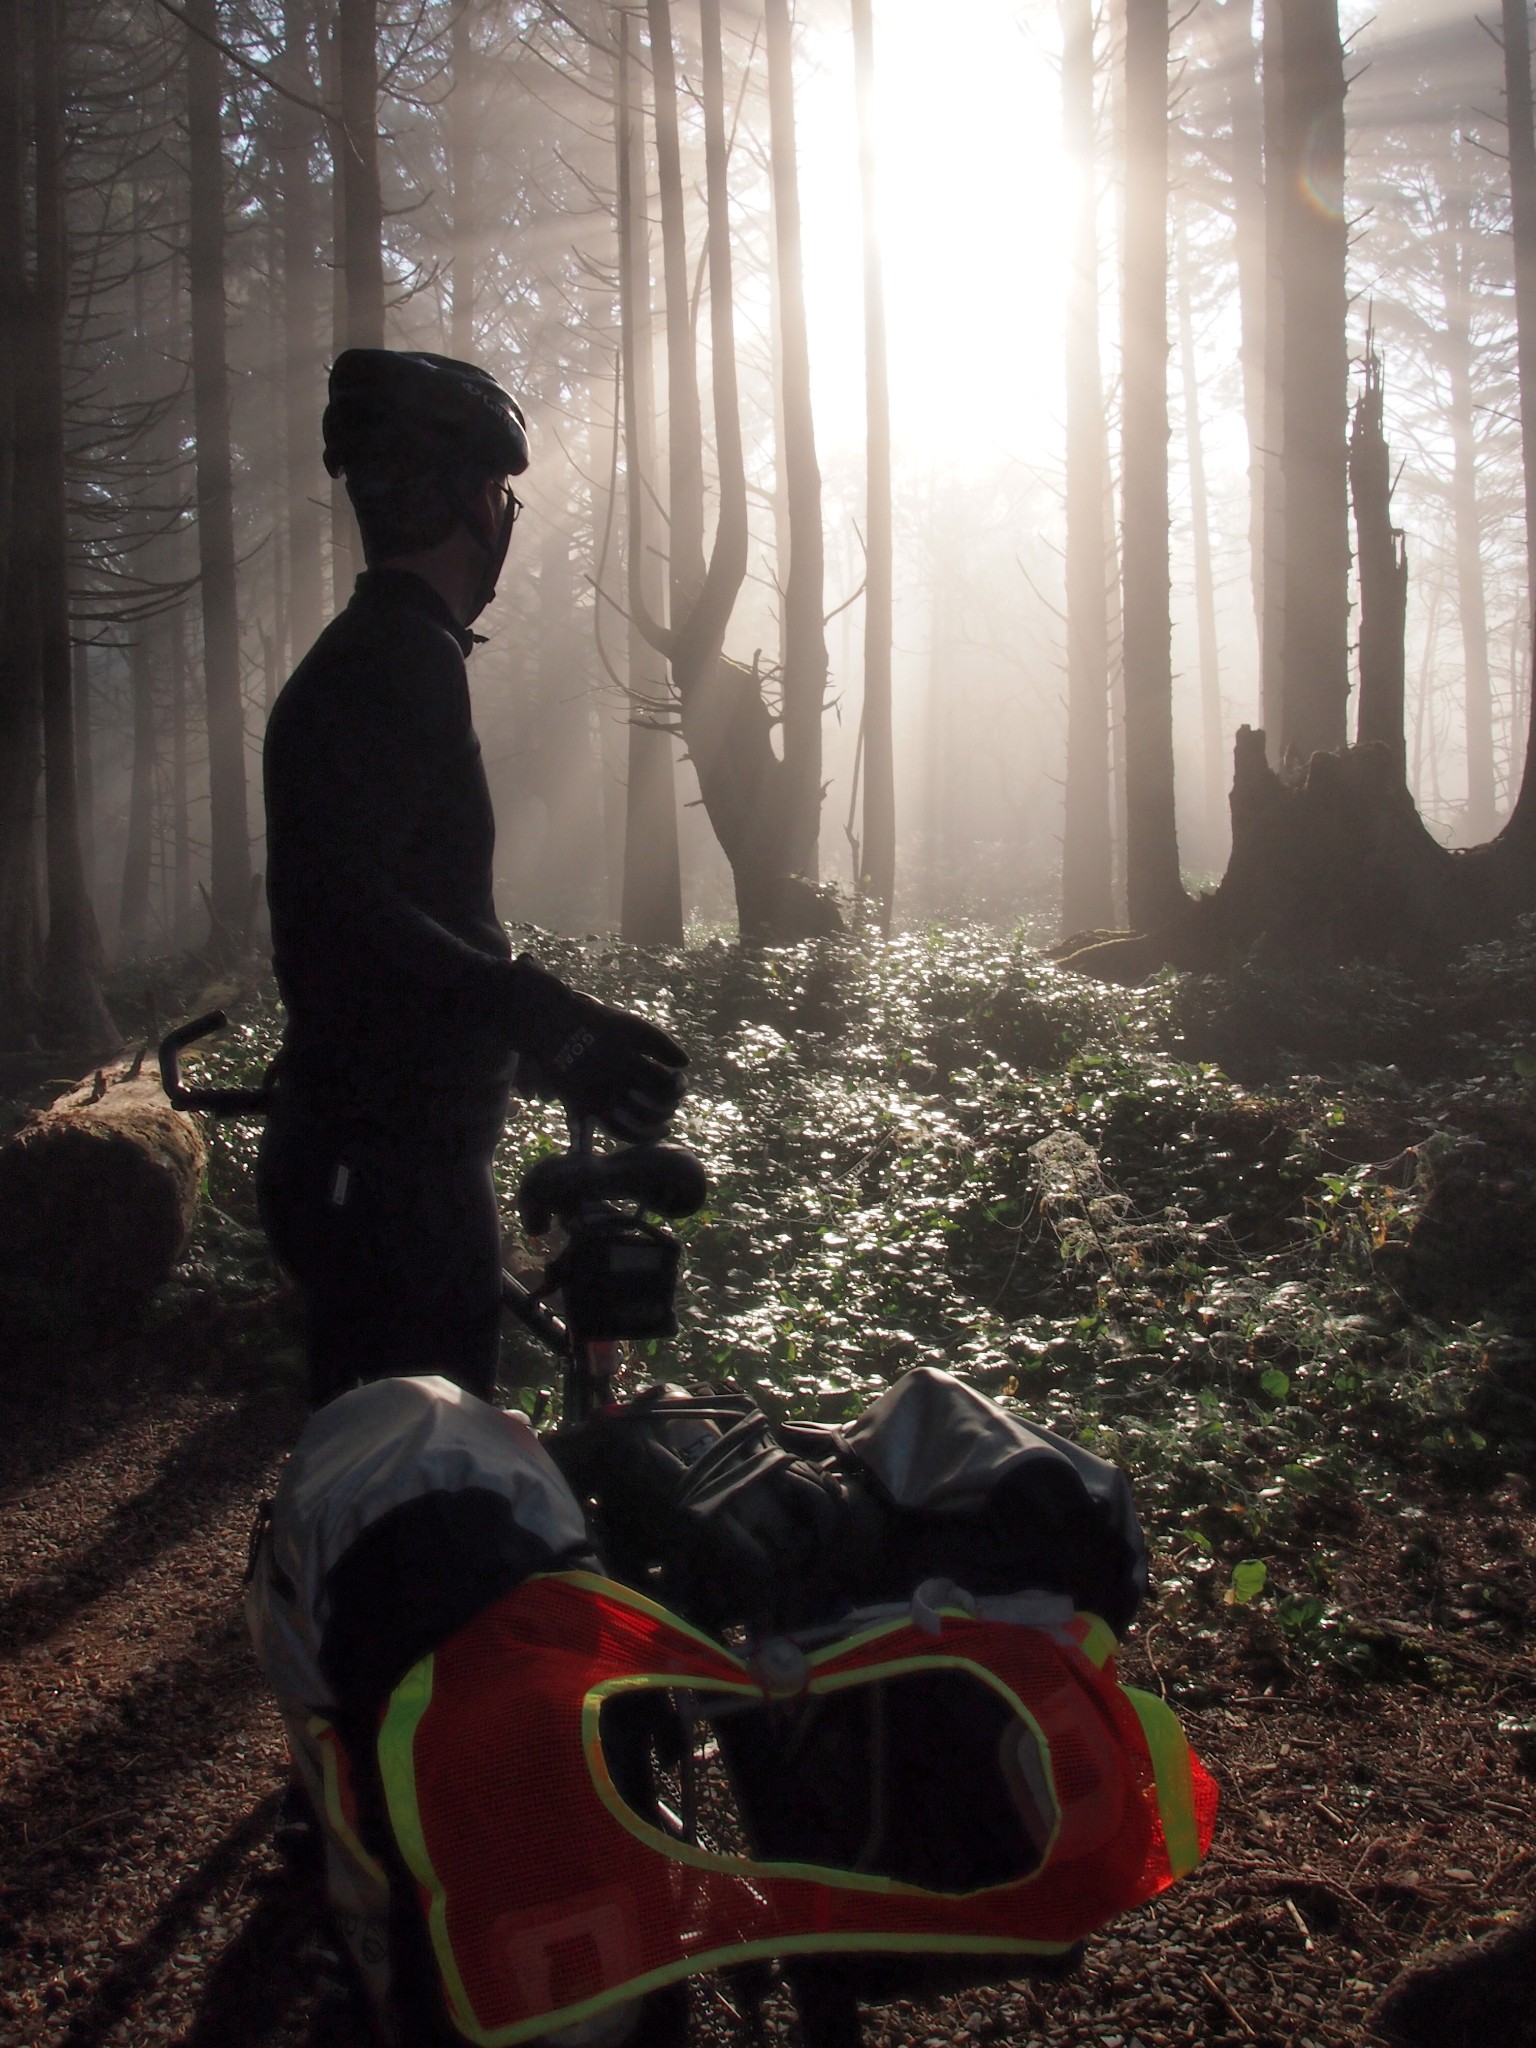
After the bridge, the sun really stated to shine, and after climbing a not-too-bad hill, we had four or five miles through some beautiful fields with mountains on the east and trees in the west. Then we started to enter the forest at the beginning of Big Sur. We rode through small groves of redwood and they were beautiful.  There were several adorable lodges and restaurants right along the river.

We knew the biggest hill of the day was coming up, so we found lots of excuses to stop.  But even our creativity for excuses eventually ran out, so we started climbing. And we climbed and climbed and climbed. Probably around 900 feet of elevation gain.  It was tough, but our Bromptons’ easiest gear is a low enough that we were able to make it without too much difficulty. This was my first experience with how having a limited number of gears can actually be beneficial. Where I would normally be trying to find the exact right gear that wasn’t too hard but that would still make me work, I was forced to use the easiest gear and accept the fact that I couldn’t push myself up the hill. It turned out to be a pleasant way to climb.

About three-quarters of the way up the hill, I heard Dani screaming less-than-friendly words at someone. It turns out that a motorcycle had cut her off by parking perpendicular to her in the shoulder, forcing her into the lane… in front of a RV.

After we reached the summit, we went to Napenthe: a fancy restaurant that charges tons of money for terrible food.  Even with the awful food, people keep coming because they want to sit on the deck and see the unbelievable view. We had an $11 steamed artichoke, and two “ambrosia” burgers that came with a “famous secret sauce” that was actually thousand island dressing. The burgers were $18 each. The service was also terrible, and I felt compelled to write a note on the receipt explaining all of the reasons for the poor tip.
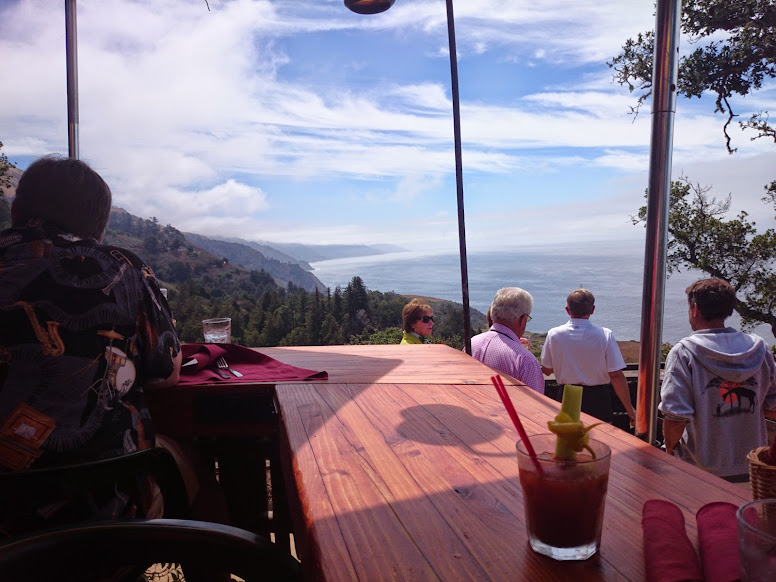
A great view!!!

A great view!!

...with terrible food.

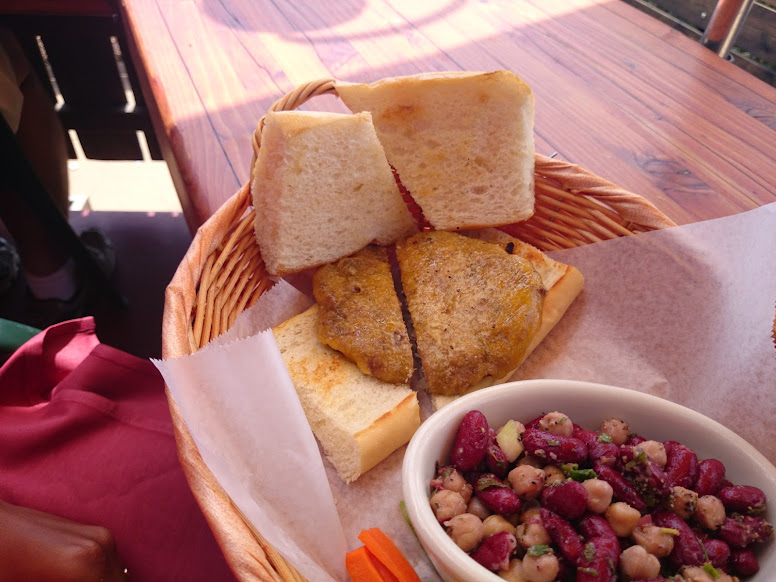
…with terrible food.

After Napenthe, we went to the cafe below it, drank some coffee and charged our phones.
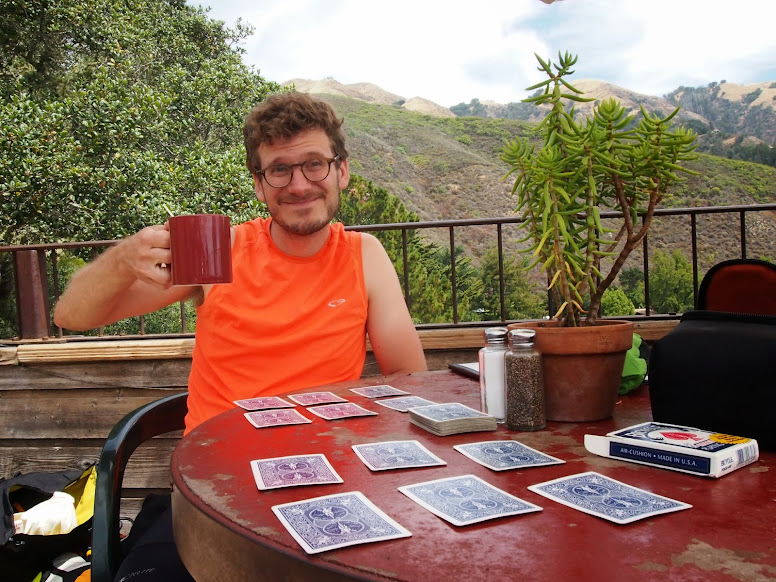
Coffee and “golf.”

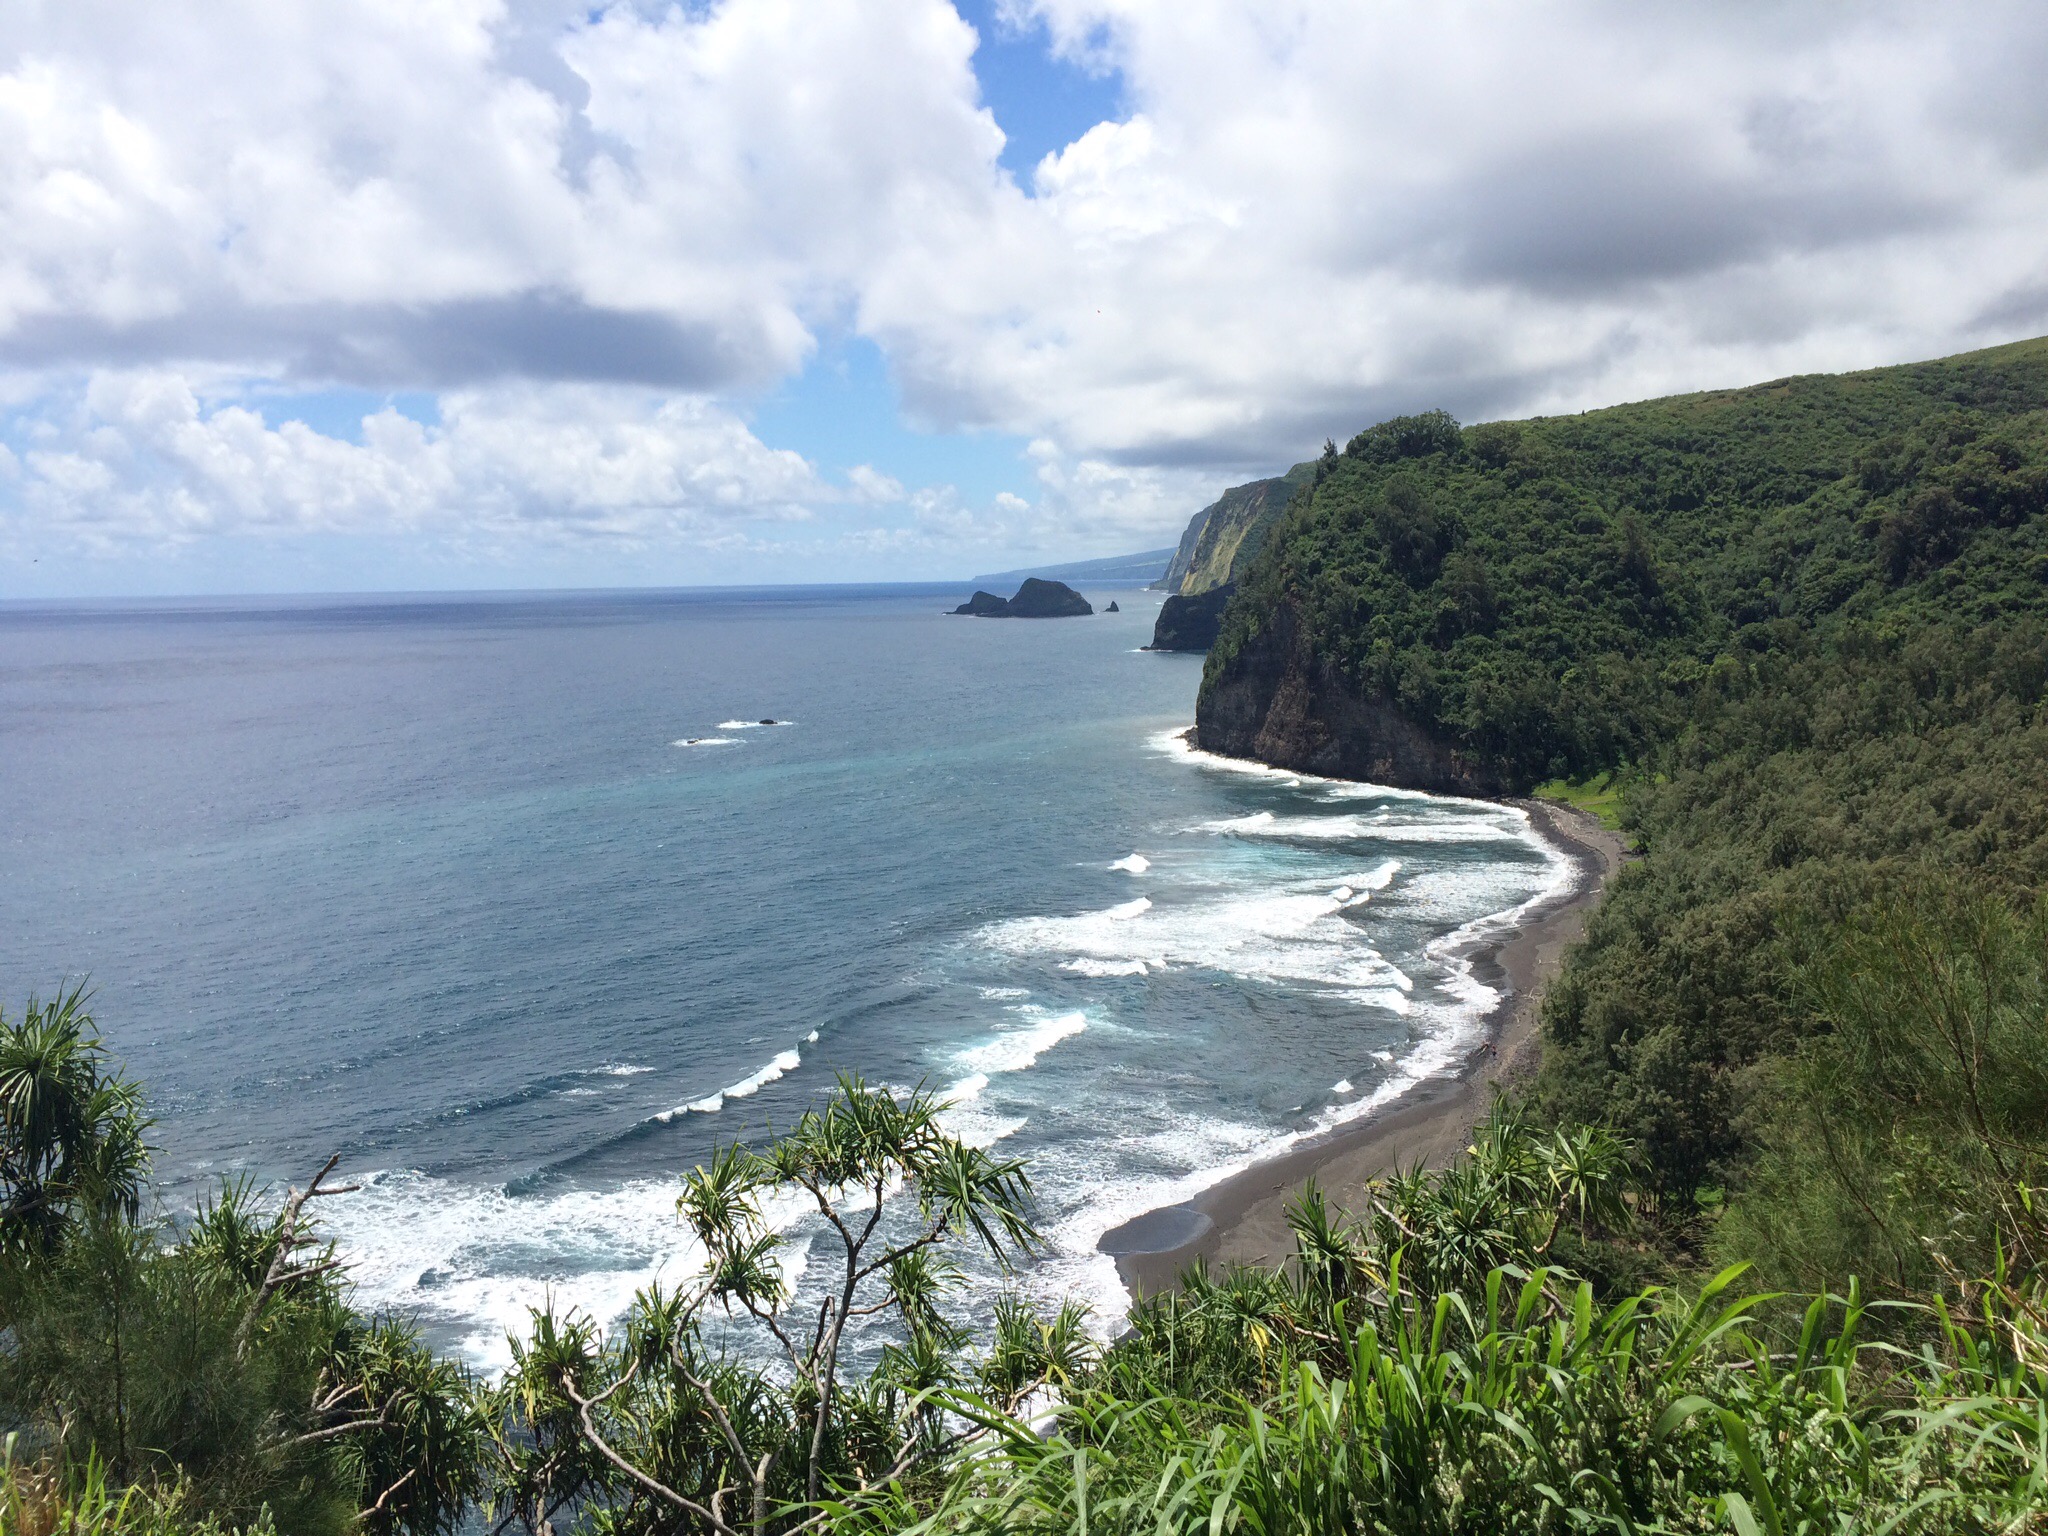
We had a big initial downhill, but then lots of up and down.  After another 10 miles we came to McWay Falls, a thin waterfall that shoots out of a bluff onto the beach and down to this GORGEOUS blue green cove. One of the most beautiful things I’ve seen.  On our way out, I made the mistake of standing on a sidewalk that a man in a minivan was trying to use to make an illegal u-turn. I stood, baffled, as I absorbed an incredible volume of invectives cast my way.


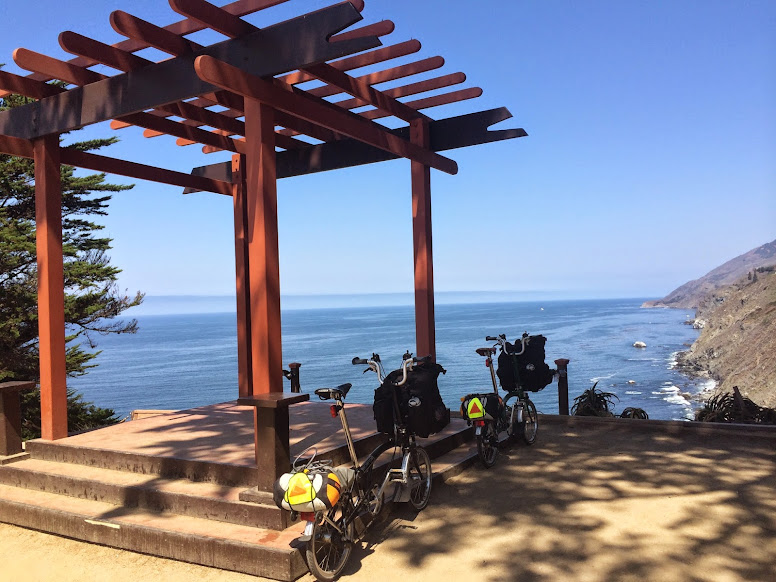
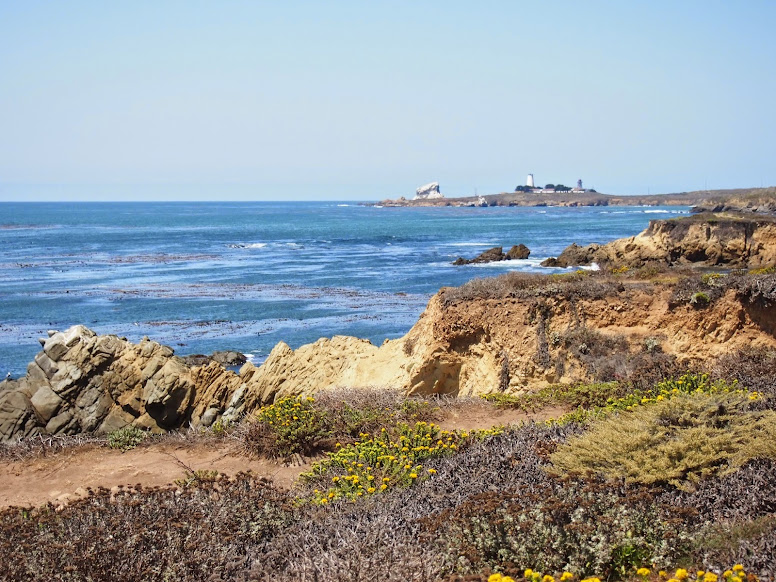
For the rest of the day, the shoulders were narrow to nonexistent and the hills were constant, but Big Sur might be the most stunningly beautiful area I’ve ever seen. View after view. Turquoise water washing up on white sand beaches backed by majestic bluffs. Whales cresting and blowing in the distance. Amazing beauty.


After the area right around Napenthe, we didn’t pass another building for 25 miles, when we arrived at the one-shop “town” of Lucia. We were excited to eat, but the restaurant was closed for the break between lunch and dinner (and the owner refused to even fill up my water bottle), so we ended up paying $6.50 for a frozen burrito and $4 for a coconut water. I guess when you’re the only store for 50 miles, you can get away with a little price gouging. But I encourage anyone in the area to steer clear. While we were busy being denied sustenance, a lady saw our Bromptons and remarked to Dani she had hers in her truck, and that our bikes were really better suited to cruising rather than climbing the hills of Big Sur.  It’s always fun to have people tell you that what you’re doing is impossible.

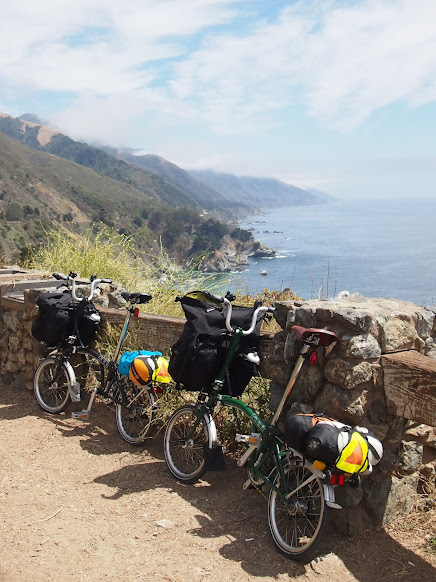
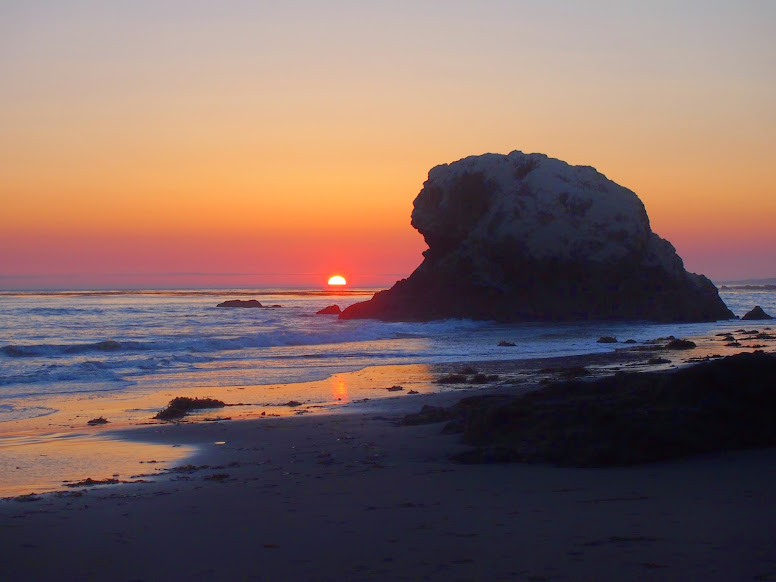
Three miles after Lucia, we arrived at Kirk Creek Campground. We set up camp in an amazing hiker biker site right next to the ocean, and met a few other bike tourists (a solo and a father-daughter team). We snacked, played cards, and watched the sun set over the Pacific before hunkering down in our tent (at 8:45) to rest up for the next day. We also saw some whales having a feeding frenzy just a hundred or so feet off the shore. There were lots of blows, a few breaches, and a couple of tail flukes.  I had never seen a whale before, so that was amazing. The only downside to the camp is that there was no water, so we spent a few hours trying to track down the elusive campground host so we could pay him $5 for a gallon of water.

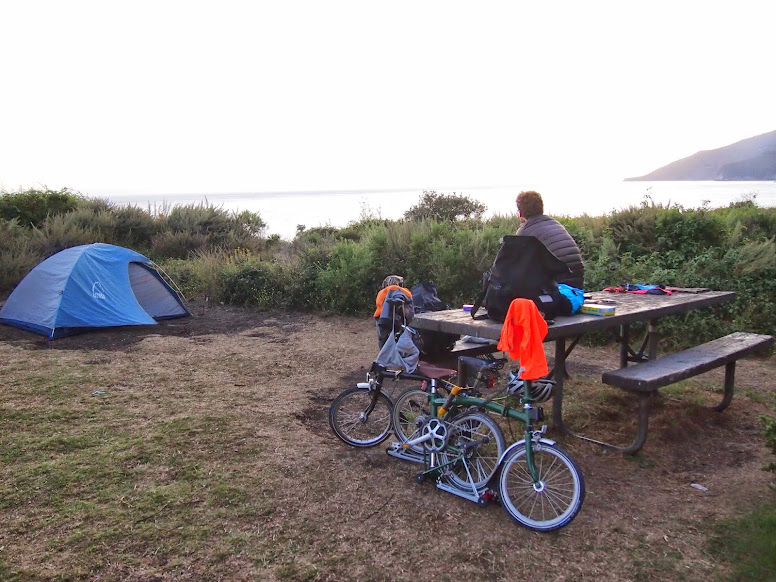
Campground by the sea.

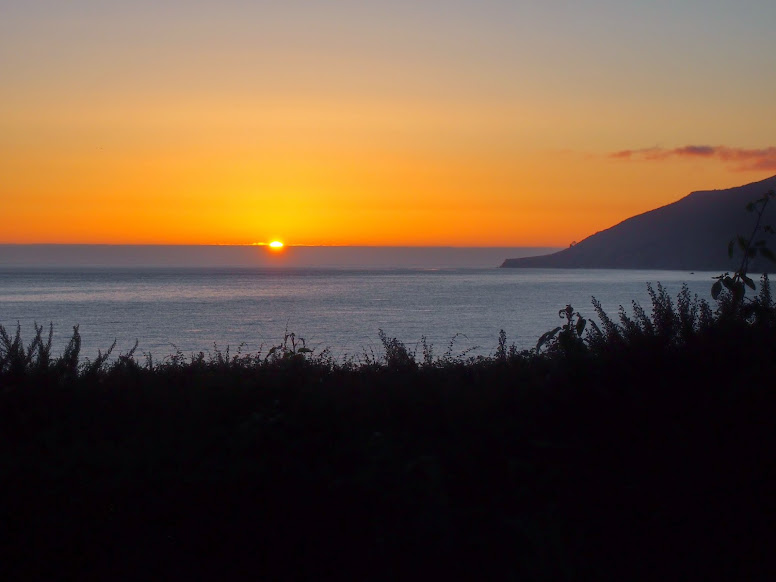
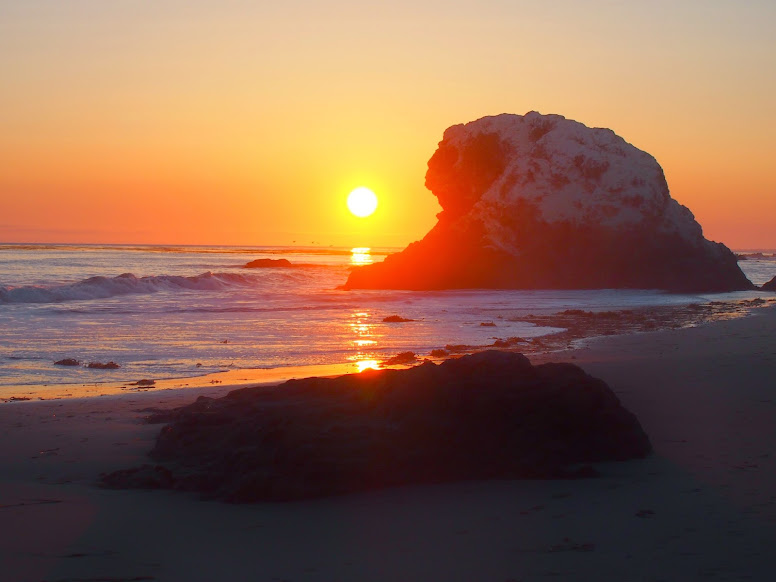
The first sunset of the trip.

Map and stats.

Welcome to Panniers and Granny Gears!

Hello everyone! We are Danielle Cummings and Ted Olds, two folks who live in Brooklyn, NY and whose favorite mode of transportation is our bicycles. Danielle is graduating from a Masters in Public Administration program at NYU in May, and Ted is beginning law school in August. That leaves us with a 2+ month gap in real-life responsibility and perhaps our last opportunity to take our dream vacation: a coast-to-coast bike tour of North America. So we’re doing it! We’re really doing it.

Approaching Big Sur on our Brompton folding bikes

Approaching Big Sur on our Brompton folding bikes

Why are we starting this blog? We figured people (read: our moms and dads and maybe our brothers and sisters) would want to hear about and see our progress (at least we hope so), so we figured a blog was an efficient way to share. Plus, it will be nice to have a record of this trip to share with our grandkids someday. Our upcoming tour inspired this blog, but we’ll also review some of our past bike tours and we plan to add new trips as we travel in the future.

Leaving Cape Lookout State Park at sunrise.

Leaving Cape Lookout State Park at sunrise.

Why are we riding our bikes across the country? We fell in love with bike touring on our honeymoon in 2012 – a one-week bike trip down the Oregon coast. If it were up to us we would have kept cycling until we reached Patagonia, but work and dog beckoned, so we headed home and dreamt of our next big trip. We’ve only had a chance to take a few more (too-short, can barely call them) bike tours, so we’re thrilled to take two months to travel from Anacortes, WA to Brooklyn, NY. That’s right – we plan to ride to Coney Island and then roll up to our front door on the last day of the trip.

Dirty, sweaty, stinky honeymoon bike tour.

Dirty, sweaty, stinky honeymoon bike tour.

Why do we enjoy bike touring? Danielle is ruthlessly efficient and nothing makes her happier than carrying everything she needs to live on her back or in panniers. Ted believes cycling is the perfect speed at which to travel – fast enough that you travel a decent distance in a day (as opposed to backpacking) and slow enough that you can take in the scenery (as opposed to car travel). Also, nothing can describe the joy of bike touring – it’s self-sufficiency; being slammed in the face with magnificent beauty; stretching your physical, mental, spiritual, and emotional self; and meeting incredible people along the way. It’s everything.

Dani packing efficiently

Dani packing efficiently

Ted moving along the coast at the perfect pace.

Ted moving along the coast at the perfect pace.

We’re happy you’ve decided to look at our blog. We hope you enjoy it (mom and dad)! Cheers, D+T